

Original artwork and photographs by Kent Theesen.
Sunday, March 25, 2012
Wednesday, March 7, 2012

Tuesday, February 21, 2012

Monday, February 20, 2012


Tuesday, February 14, 2012

Monday, February 13, 2012


Saturday, February 11, 2012


Wednesday, February 8, 2012

Monday, February 6, 2012


Sunday, February 5, 2012
How to digitally add a signature to art. For GIMP and Photoshop
This is my first tutorial that I am releasing, these will be posted every so often (Whenever I get an idea for basic tutorials like this, anyways let's get started!
If you want to add a scanned signature to your digital artwork, open your image editing program and follow these steps.
Note: These steps should work in Photoshop and GIMP, any other programs, I am not sure of, your mileage may vary.
---
Step 0: Sign a blank sheet of white paper with your signature and scan it. (Try to scan it at the highest resolution possible)

Step 1: Select the signature with either the Fuzzy Select Tool (Known as the Magic Wand Tool in Photoshop) or the Select by Color Tool. Up the threshold on the tools until you get a nice even selection over the signature. Hold shift and click other areas with the Fuzzy Select Tool/Magic Wand to get the whole signature selected.
Note: If you accidentally select a white area of the image, just hit control + Z (at the same time) to undo what you did. Alternatively, you can go to Edit>Undo.

If you see the above around the signature, then that means you have Selected the signature (and nothing else)
Step 2: Go to Edit and click on Copy or Cut.
Step 3: Create a new Transparent Layer and paste the signature on it. Delete the old Layer.
~Jonathon Theesen
If you want to add a scanned signature to your digital artwork, open your image editing program and follow these steps.
Note: These steps should work in Photoshop and GIMP, any other programs, I am not sure of, your mileage may vary.
---
Step 0: Sign a blank sheet of white paper with your signature and scan it. (Try to scan it at the highest resolution possible)
- Open it up and crop it (Use crop tool, and drag out area, and crop out the useless white area of the paper, the area you select will be lighter than the surronding area.
- Hit Enter

Step 1: Select the signature with either the Fuzzy Select Tool (Known as the Magic Wand Tool in Photoshop) or the Select by Color Tool. Up the threshold on the tools until you get a nice even selection over the signature. Hold shift and click other areas with the Fuzzy Select Tool/Magic Wand to get the whole signature selected.
Note: If you accidentally select a white area of the image, just hit control + Z (at the same time) to undo what you did. Alternatively, you can go to Edit>Undo.

If you see the above around the signature, then that means you have Selected the signature (and nothing else)
Step 2: Go to Edit and click on Copy or Cut.
Step 3: Create a new Transparent Layer and paste the signature on it. Delete the old Layer.
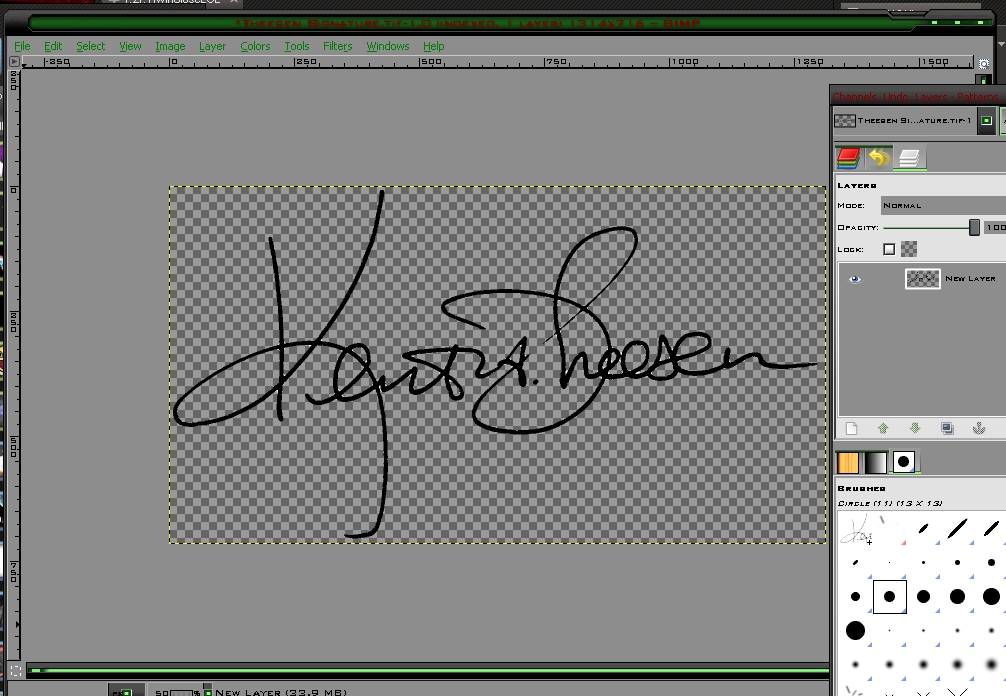 |
| End result should look like this. |
- For GIMP: Either hit the white paper icon in the layers window, or go to Layer>New Layer. Make sure the Layer Fill Type is transparency.
- For Photoshop: It is pretty much the same, If it isn't comment on this post and correct me.
 |
| The Drop down menu and New Layer box. |
Step 4: Copy and Paste your image to the image you want to have it on, scale it down if it doesn't fit (Be sure to save the high-res transparent signature first though! .gif and .tif supports transparency)
Alternatively you can create a brush with the signature, and you can scale it using the built in tools. GIMP automatically makes a brush out of what ever image is in the clipboard.
 |
| Pasted signature on photograph, before anchoring. |
 |
| Finished Product. |
I hope everyone reading this enjoyed the tutorial! This was pretty fun to make!
~Jonathon Theesen

Thursday, February 2, 2012


Wednesday, February 1, 2012

Tuesday, January 31, 2012


Monday, January 30, 2012


Comic book Fractal Desktop Background
 |
| My best one (in my opinion) that I have made so far. I added the copyright stuff to the side so people wouldn't steal it, I hope it doesn't get in your way. |

Old Desktop Background
 I'm sorry this isn't the highest resoulution, It was made for my laptop, I hope you all enjoy it anyways
Image Resolution is 1280x 800
~Jonathon Theesen
P.S. I will work on Backgrounds to post on this blog while My dad sends me his work, expect more of these to come!
If you DL these backgrounds please remember to spread the word around about this blog!


Abstract Circles

This blog is under new management, and will have more pictures added as time goes by.
Hope you guys enjoy all of these pictures, we hope to get a website up soon!
We will redirect the tee-sunproductions.com domain here soon (I'm hoping to have it switched over tommorow, but I'm not sure when we can do that)
Enjoy!
~Jonathon
Subscribe to:
Comments (Atom)